![]()
|
Summary: Paper describes how to customize Microsoft Visual Studio IDE with MDL development, how to build up your knowledge base and introduces MDL project wizard for Visual Studio 6.
Date: August 2002 Published in : CAD I/2003 Authors: Stanislav Sumbera
Integrated development environment - IDE Step 1. MDL language syntax highlighting Step 2. MDL built-in functions highlighting Step 5. Integrating MDL help with MSDN Step 6. Advanced customization |
Integrated development environment - IDE
MicroStation Development Environment (MDE) presented on installation of MicroStation unfortunately doesn’t contain any Integrated Development Environment for developing MDL programs. Although you may write MDL code in any text editor, I guess MDL programmers in 21.century deserve more, at least :
· File management
· Syntax highlighting
· Automatically Completing Statements - Intellisense
· Context help
· Comprehensive visual debugger
· Optionally version management for large projects
Using these features will certainly help you in developing process and will positively affect the quality of your MDL application. Although you may use any IDE I would recommend to use Visual Studio v.6 or Visual Studio.NET respectively. The main reason is that you will get with Visual Studio a native compiler used by MicroStation bmake utility to compile MDL into native code (DLL).
Setting up Visual Studio v.6
Make sure you have installed Visual C++ v.6 with service pack 5 and Microsoft Development Library (MSDN). To set up IDE for MDL several steps need to be done. We will go through them. step by step.
Step 1. MDL language syntax highlighting
MDL code is C code. We need that Visual Studio recognize file extensions of MDL related files as C-based files. This extensions are primary : .mc; .fdf;.r;.mt;. The information of file extension is stored in registry key:
[HKEY_CURRENT_USER\Software\Microsoft\DevStudio\6.0\
Text Editor\Tabs/Language Settings\C/C++]
"FileExtensions"="cpp;cxx;c;h;hxx;hpp;inl;tlh;tli;rc;rc2;mc;fdf;mt;r"
Run file VC_MDL_HIGHLIT.reg from folder IDE to update registry entries or extend registry manually by running regedit.exe. Now run Visual Studio, open any .mc file via File/Open menu and see highlighting syntax of code. Go to Tools/Options... menu and select Format tab page. In the Category list select Source Windows; in Font option list choose Courier New font with size 10pt. Then select in Colors option list type of code text and use Foreground and Background items to set its corresponding colors as you wish. Check the Keyword type to be colored.
Step 2. Set MDL built- in functions to be highlighted as keywords
Wouldn’t be nice to have highlighted all MDL built-in functions as keyword ? We may do this by populating file usertype.dat with all keyword names – in this case all mdl functions. The file must be subsequently copied into the same directory where msdev.exe resides. By default this will be C:\Program Files\Microsoft Visual Studio\Common\MSDev98\Bin. The file you may download form folder... it contains all mdl functions (even undocumented). Optionally you may add there MDL types or constants. Restart Visual Studio, open arbitrary mc file and see keyword-color of all mdl functions.
Step 3. Creating MDL project
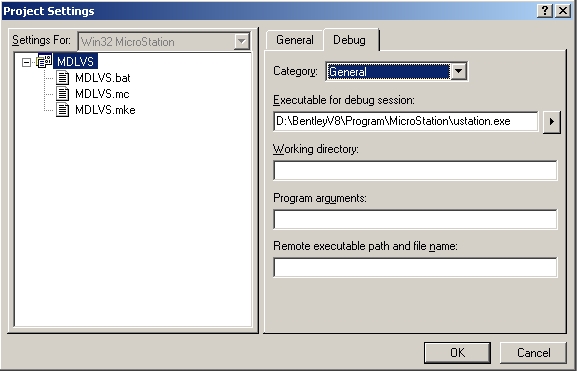
Select New... from the File menu to bring up the list shown in Figure. Select Project tab page. From the available projects choose Makefile. On the right side of the dialog, in the Location edit item select parent folder of you project. Type your project name into the Project name edit item. Visual Studio will make the folder according to the Project name (or will use the existing one if the folder with this name already exists). Toggle on option Create new workspace.

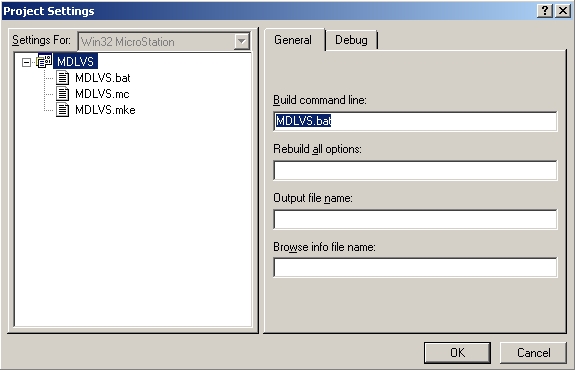
Press OK. Next wizard dialog asks for Command line for DEBUG configuration. Visual Studio has basically two configuration for running compilation process: Debug used for debug compilation, and Release, used for final release code. Despite you may use them for compilation, I would recommend to use only one configuration and directly edit batch and make file for any necessary changes in build process.
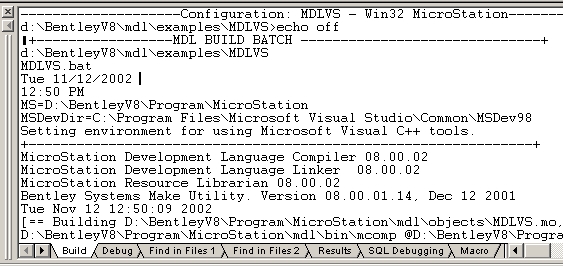
Delete any content there and type there your project name plus .bat extension, for instance treexmpl.bat. This will be a batch file for running MicroStation compilation. Then type into the Output your final application name, e.g. treexmpl.ma, and you may leave Rebuild All Switch as it is. Press Finish button.
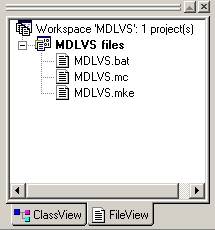
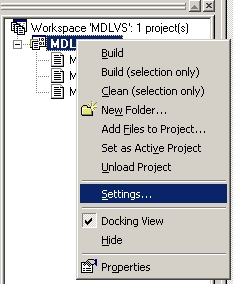
Wizard creates workspace and project with three virtual folders :Source Files, Header Files and Resource Files. Now you may add source files to appropriate folders by clicking right mouse on item and selecting Add Files to Folder.
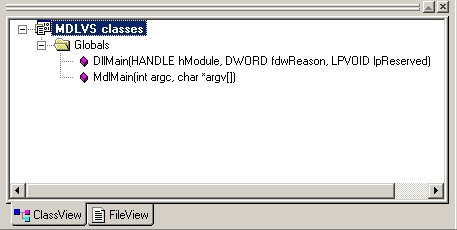
After adding all files you should be able to see Class View with all structures and functions used in your project. This is very useful for navigation through the code. If Wizard Bar tool box is presented on upper pane (see menu Tools/Customize/ Toolbars ) you may then quickly access function from option list there.


Visual Studio also helps with statement completition features (intellisense) of declared functions and types. If you have checked in Tools/Options dialog in Editor tab options for statement completition you may see parameter list when typing a function, for instance :
![]()
Or trying to access members of data structure:

Step 4. Enabling intellisense for MDL built-in functions
Unfortunately intellisense doesn’t work implicitly for built-in mdl functions. Wouldn’t be this a nice feature when programming with MDL ? Fortunately there is a trick how to force Visual Studio to show parameter info and data members of mdl functions. For each workspace Visual Studio stores browse information in binary .ncb file. Browse information hold records for each entity and where it’s used in our project files. This data are used by intellisense to offer parameter info when typing a function. Intellisense works fine for function definition. MDL built in function are declared in fdf files. So we need to change declaration to definition and include them into Visual Studio project so intellisense would catch them. Of course we cannot and may not overwrite standard mdl function, so this would be only temporary. All files needed are presented in folder ..../intellisense. Here are steps to turn on intellisense for mdl functions:
1. Make new virtual folder in project. Right click on project name in FileView pane, select New Folder and type intellisense. A new folder is created.
2. Right click on the just created folder and choose Add Files to Folder. Insert Files into Project dialog appears. Browse to folder with intellisense mdl files, switch Files of Type on *.* and select all 284 files. Click OK and wait until Visual Studio is ready. it may take few minutes for updating all browse information.Important : I was not allowed to distribute fdf files so you will find them already included in .ncb file inside MDLWizard tool, actually MDLWizard will copy this file for you, or you may copy it manually. if you want however, please mekae copy of all fdf and header files into arbitrary folder and replace fr each function declaracion ";" to definition "{}" please refer to FAQ
3. Delete folder previously created –intellisense in this case.
4. Choose Save All from File menu and close project.
5. Reopen project and the intellisense should work for mdl files and structures.
The intellisense should now work . Note when you delete .ncb file you nee to repeat these steps since new ncb file is created by Visual Studio.
![]()
Step 5. Integrating MDL help with MSDN context help
Very often we need to search particular keyword or function definition in help documentation. or in any other supplied help files. Visual Studio provides MSDN help containing all necessary information for developers under Windows platform. Since MDL is C based language we may find there for example a useful C code reference. But I guess you would like to have there a MDL help reference and mdl programmer's guide help files too. Then we need to integrate supplied Bentley help files with MSDN help files.
MSDN stores content information about the help files in XML formatted file called collection. Actually collection uses two files : msdnxxx.col (actual collection) and hhcolreg.dat (collection registry) .We need to find and update these two files to force MSDN to count with Bentley help files. To find these file you may use this VBScrip stored in IDE/Macros.
'1. get Windows Scripting Host and File System objects
Set WshShell = WScript.CreateObject("WScript.Shell")
Set fso = CreateObject("Scripting.FileSystemObject")
'2. reading registry entry to locate collection file
COLfile = WshShell.RegRead(_
"HKLM\SOFTWARE\Microsoft\HTML Help Collections\" +_
"Developer Collections\0x0409\0x035900940\Filename")
'3.location of dat file in system or setting dirs
DATfile98 = fso.GetSpecialFolder(WindowsFolder)+"\Help\hhcolreg.dat"
DATfile = Replace(WshShell.SpecialFolders("AllUsersDesktop"),_
"Desktop","Application Data\Microsoft\HTML Help\hhcolreg.dat")
'4. print if files exists and open them in notepad
if (fso.FileExists(COLfile)) then WScript.Echo (COLfile):_
WshShell.Run ("notepad " & COLfile)
if (fso.FileExists(DATfile98)) then DATfile = DATfile98
if (fso.FileExists(DATfile)) then WScript.Echo (DATfile) :_
WshShell.Run ("notepad " & DATfile)
the console output of this script could be like this :
C:\Program Files\Microsoft Visual Studio\MSDN98\98VSa\1033\msdnvs6a.col
C:\WINDOWS\Help\hhcolreg.dat
Let’s update collection file msdnvs6a.col. At the end of the file you will find ending tag for collection folders </Folders> . Put before this tag following XML and save file:
<
Folder><TitleString value="MDL api reference"/> <FolderOrder value=2/> <TitleString value="=bentley_mdl_reference"/> <FolderOrder value=1/> <LangId value=1033/>
</
Folder>Updating file hhcolreg.dat require similarly to put before tag </DocCompilations> following XML:
<DocCompilation>
<DocCompId value="bentley_msv8_mdl_ref" />
<DocCompLanguage value="1033" />
<LocationHistory>
<ColNum value="3" />
<TitleLocation value="C:\HELP\MDL_API.chm" />
<IndexLocation value="C:\HELP\MDL_API.chi" />
<QueryLocation value=""/>
<LocationRef value="" />
<Version value="1" />
<LastPromptedVersion value="0" />
<TitleSampleLocation value="" />
<TitleQueryLocation value="" />
<SupportsMerge value="0" />
</LocationHistory>
</ DocCompilation>
Change the value for the tag TitleLocation according your help file location. The key value DocCompId must be unique, best would be GUID identifier and must correspond to the value in key TitleString in previous file. The help index file (.chi) is not in standard help file installation, so in folder IDE/MDLhelp you will find it. Alternatively to this manual setting you may use for help integration utility called MSDNIntegrator which is stored in folder IDE/HelpIntegration. Run this tool and specify chm and chi mdl help files located in IDE/MDLHelp.
After integration run Visual Studio, enter any mdl function and while standing on the function with cursor pres F1. MSDN help will be displayed, after re-indexing its content a description for the function should be displayed. You may add other resources for rich knowledge base as is shown on figure bellow.
|
|
Look on sample files: msdnvs6a.col and hhcolreg.dat
|
Step 6. Advanced customization of Visual Studio – macros and Add-ins
Macros are pretty cool in Visual Studio. Actually you may write your own VBScript macros to automate tasks when writing MDL code. Macros can reduce boring “copy-paste-rename” workflow in development process. Moreover you may create for your development team code templates and wizards to automate common steps. An example of simple macro for creating mc file based on template is shown bellow .
On Error resume Next
Sub CreateNewMC()
Set fso = CreateObject("Scripting.FileSystemObject")
MCtemplate = fso.GetParentFolderName(Application.Path)+ _
"\template\MDLproj.mc"
'-- prompt for input mc file
fileName = InputBox("Enter name","Add mc file", _
ActiveProject.Name+".mc")
'-- build target mc full name
MCtarget = fso.GetParentFolderName(ActiveProject.Fullname)+ _
"\"+fileName
'-- open template and make selection
Documents.Open MCtemplate
Set doc =
ActiveDocument
doc.Selection.SelectAll
'-- replace template variables with
doc.Selection.ReplaceText "##FILE", fileName, dsMatchRegExp
doc.Selection.ReplaceText "##TIME", Now, dsMatchRegExp
doc.Selection.Cancel
'-- save file and add it to active project
doc.Save MCtarget,true
ActiveProject.AddFile fileName
Set fso = Nothing
End Sub
You will find in folder IDE/MDLtool utility for creating different types of MDL code. Copy the MDLtool.dll into the directory Common\MSDev98\AddIns and copy templates to the Common\MSDev98\template directory respectively founded under Visual Studio base directory (by default it will be C:\Program Files\Microsoft Visual Studio). Restart you Visual Studio and go to Tools/Customize menu. A dialog box Customize will appear. Go to tab page Add-ins and Macro files and check in MDL tools in list item Add-ins and macro files. An MDL toolbar will be displayed. Now you may create MDL application on 2 clicks !

Project name: enter the name of you MDL project
Project location: Chose parent location for you project
Add to workspace : Check this option if you need to add newly created project into the workspace. If not checked a new workspace will be created for your project
MicroStation version : Select from combo box target MicroStation version for your MDL application.
Template location: Only If you have different templates change the folder to the desired one
Perform build : Check-in this option if you request build after wizard is finished
Project Type: Select the MDL project type you are going to generate
Generate files : Check-in any files you want to be generated.


